Welcome to our step-by-step tutorial on how to uninstall WordPress from Hostinger.
Whether you’re looking to start fresh, fix persistent issues, or simply reset your website, this guide will walk you through the entire process. Uninstalling WordPress can be a daunting task, especially if you’re unsure of where to begin or worried about potential data loss.
In this tutorial, we’ll cover everything you need to know to safely and effectively uninstall WordPress from your Hostinger hosting account. By following these clear and detailed steps, you’ll be able to cleanly remove WordPress and prepare your hosting environment for a new installation or different use.
Resetting your website can resolve many common problems, such as:
- Persistent technical issues that are difficult to troubleshoot
- A desire to change the overall design and structure of your site
- The need to remove all existing content and start from scratch
By the end of this guide, you’ll have a clean slate, ready to build the website of your dreams or resolve any issues that have been holding you back. Let’s get started!
Step-by-Step Instructions
1) Access the File Manager:
-
-
- On your WordPress dashboard, locate the FILE menu and select File Manager
-
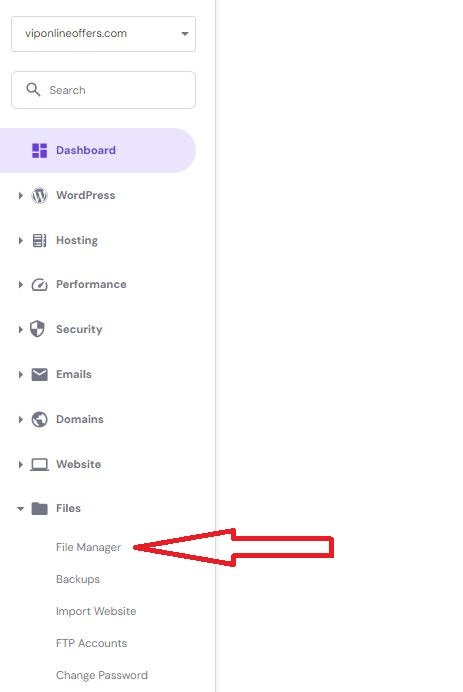
2) Select Your Website Files:
- Choose the files from your website. Your website name should be displayed here. If not, make sure you have selected it on your WordPress dashboard.

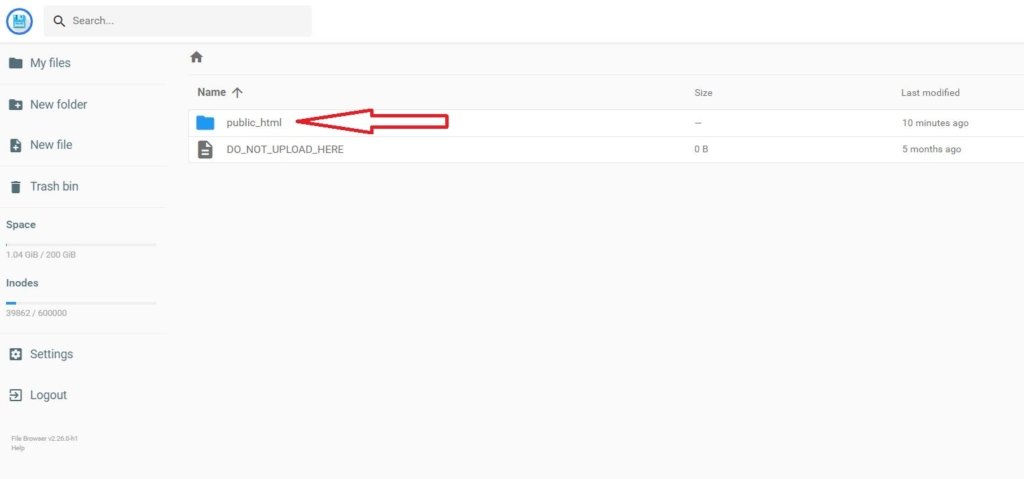
3) Navigate to Public Files:
- Select the public_html folder, where your website files are stored.
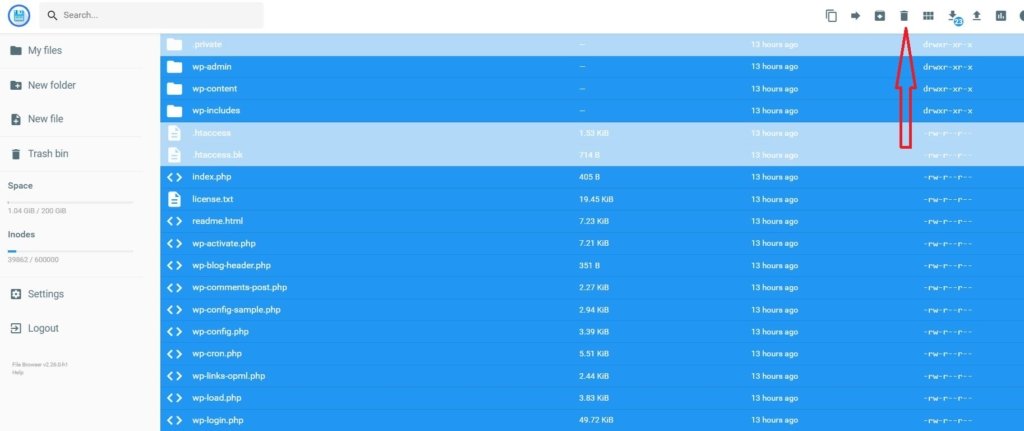
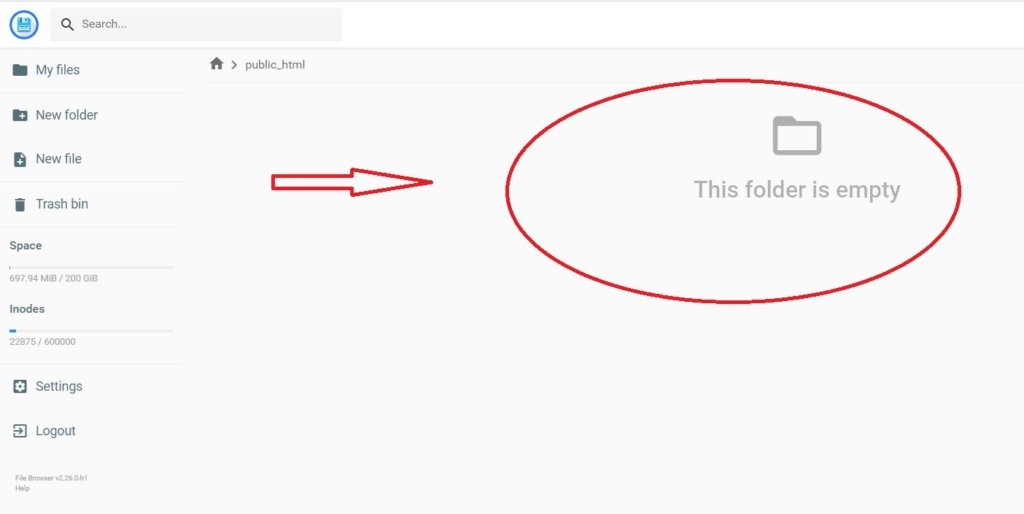
4) Delete All Files:
- Press
Ctrl + Ato select all the files. - Click the Bin icon to delete all the files at once.
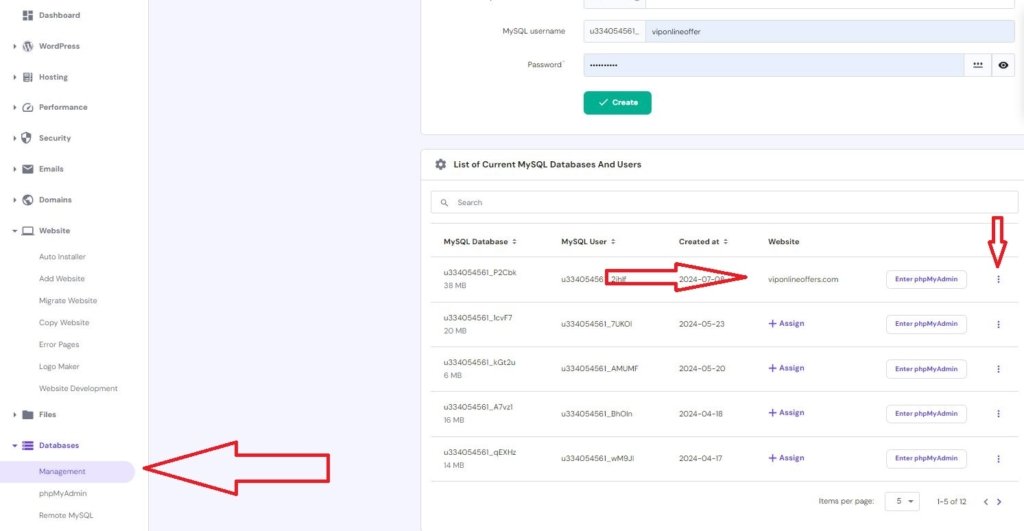
5) Manage Databases:
- Go back to the dashboard.
- a) Find the Databases section and select Database Management.
- b) Locate your website’s database (it should be the first option).
- c) Click on the three dots next to your database and select Delete.
Reinstalling WordPress
Now that you have completely uninstalled WordPress from your website, it’s time to reinstall it for a fresh start. Follow these steps:
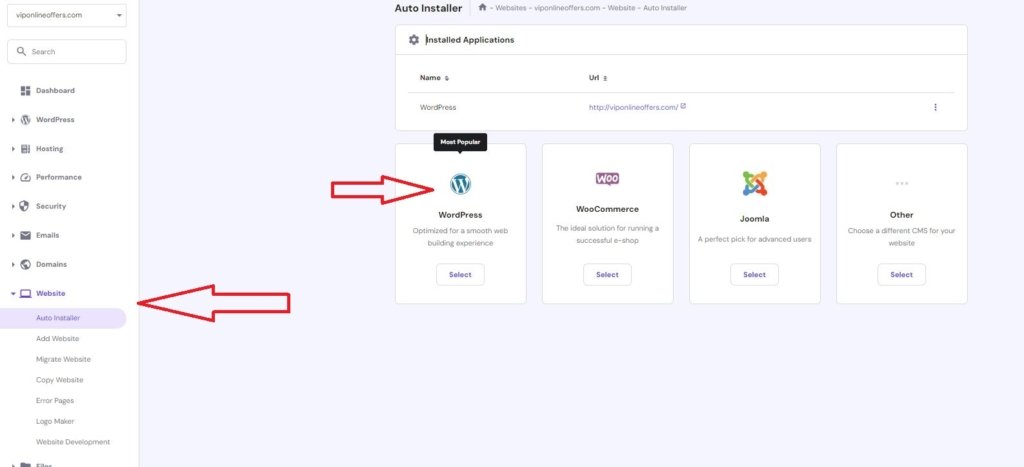
- Website Auto Installer:
- On the dashboard, navigate to Auto Installer.
- Select WordPress:
- Choose WordPress and start the installation process.
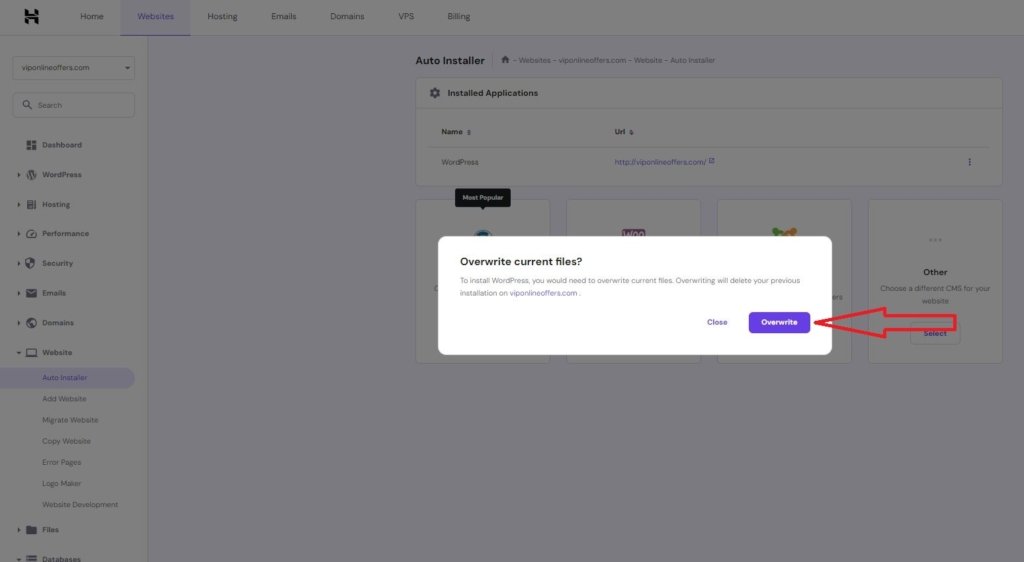
Overwrite Current Files:
- Proceed with the installation until you are prompted with the question “Overwrite currently existing files?”. Select Overwrite.
Conclusion
You are now ready to start fresh with a clean installation of WordPress. This process, while straightforward, can take some time to complete. If you found this guide helpful, please share it with friends who might benefit from it.
Happy building, and thank you for choosing how2ideas.com for your tutorial needs!
